Full Transcript
https://www.youtube.com/watch?v=jBSDPP-wbtw
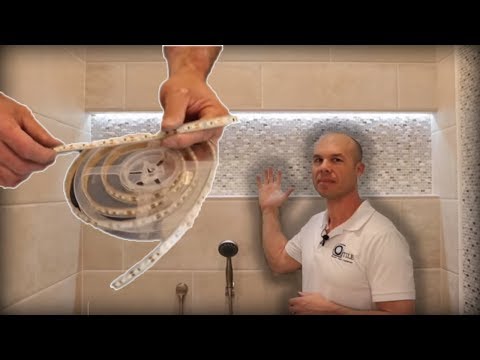
[00:01] Hello, I'm Isaac Ostrom. Thanks for checking out another one of my videos.
[00:04] Today I'm going to show you how to install an LED lighted niche on an actual job site.
[00:11] Okay, so we're going to hook up this LED lighting and the first thing we need to do is get AC power, 120 volt AC power.
[00:23] Uh, the shower is over here, the closet is right here. We have pretty easy access to run a wire from this switch right here.
[00:31] So what I'm going to do is this is where my new dimmer is going to go. This is going to dim the LED lights and this has to be the correct dimmer.
[00:40] It can't just be any regular dimmer. Uh, the part number on this guy is, where is it? Um, that's the part number on it so you can see it.
[00:50] But it's got to be this exact part number right here. The WH just sounds for stands for white, but um if you're going to use one of these these guys, it definitely has to be that model.
[00:57] We're actually
[01:02] has to be that model we're actually going to take this single gang uh switch
[01:06] going to take this single gang uh switch here and we're going to box so that we
[01:09] here and we're going to box so that we still have our light that controls the
[01:10] still have our light that controls the closet uh but we're also going to have
[01:12] closet uh but we're also going to have our dimmer in there too so I need to run
[01:15] our dimmer in there too so I need to run a new a a wire going
[01:18] a new a a wire going from a 142 wire going from here I'm
[01:22] from a 142 wire going from here I'm going to draw power from the hot side of
[01:25] going to draw power from the hot side of this switch and then that's going to go
[01:27] this switch and then that's going to go up the wall and up in the attic we're
[01:30] up the wall and up in the attic we're going to have our 110 power hooked up
[01:32] going to have our 110 power hooked up into this
[01:34] into this Transformer that is going to change our
[01:36] Transformer that is going to change our 120 volt line over to 12vt DC low
[01:40] 120 volt line over to 12vt DC low voltage to go into the shower light so
[01:43] voltage to go into the shower light so that's the that's the basics of it um so
[01:45] that's the that's the basics of it um so yeah we need to get this line up there
[01:47] yeah we need to get this line up there so we're going to jump up in the attic
[01:50] so we're going to jump up in the attic and uh get a hole and see if we can fish
[01:52] and uh get a hole and see if we can fish this okay so I'm please do not attempt
[01:54] this okay so I'm please do not attempt to do this unless you are an electrician
[01:57] to do this unless you are an electrician if you are not please show this video to
[02:00] if you are not please show this video to an electrician so he can help you take
[02:02] an electrician so he can help you take care of
[02:14] this um one of these wires is hot way
[02:19] this um one of these wires is hot way the switches work is the way this one
[02:21] the switches work is the way this one works basically you have a hot line
[02:23] works basically you have a hot line coming in and a line that's going out to
[02:26] coming in and a line that's going out to the light this one's going to the closet
[02:28] the light this one's going to the closet light
[02:30] light my
[02:31] my handy so they're both on so that one's
[02:34] handy so they're both on so that one's hot so this is my hot line coming
[02:37] hot so this is my hot line coming in so this is the one that I need to
[02:40] in so this is the one that I need to Loop over to my new
[02:42] Loop over to my new Switch because if I were to use this one
[02:46] Switch because if I were to use this one it would be switched off of this so
[02:48] it would be switched off of this so whenever you hit this it would turn off
[02:50] whenever you hit this it would turn off the other switch so I need to go tie
[02:52] the other switch so I need to go tie into my hotline
[02:54] into my hotline here okay so I disconnected my the
[02:57] here okay so I disconnected my the original switch I got my hot line
[03:02] identified
[03:04] identified there uh these are these are remodel
[03:07] there uh these are these are remodel work cutting
[03:09] work cutting boxes um they have a little tab that you
[03:12] boxes um they have a little tab that you can just cut a hole in the drywall and
[03:15] can just cut a hole in the drywall and these little tabs suck up into the wall.
[03:18] these little tabs suck up into the wall and secure.
[03:19] and secure.
[03:28] it and so these nail Na and boxes are held in by two nails that are nailed into the studs.
[03:30] it and so these nail Na and boxes are held in by two nails that are nailed.
[03:33] held in by two nails that are nailed into the studs.
[03:37] studs so let's see if I can do that.
[03:50] that okay so I had to cut the Little Nail tabs off that were on the top and the bottom to get these guys out.
[03:52] that okay so I had to cut the Little Nail tabs off that were on the top and the bottom to get these guys out.
[03:55] Nail tabs off that were on the top and the bottom to get these guys out.
[04:01] so this is my hotline and um if we can get that line down here we're all good.
[04:05] hotline and um if we can get that line down here we're all good.
[04:08] down here we're all good all right let's.
[04:19] Go, so we got our new Roax.
[04:23] Go, so we got our new Roax line, so that's gonna, that's going to line.
[04:25] So that's gonna, that's going to power the Transformer.
[04:27] Power the Transformer. Okay, so I got my uh, we fished our new line.
[04:30] We fished our new line that this is going to our Transformer.
[04:32] This is going to our Transformer, going to bring this one in.
[04:34] Bring this one in. Bring this line in on this side out as much as I can.
[04:39] On this side out as much as I can get as much line work with as I can.
[04:46] As I can. That's good. I can, I can work with those wires for sure.
[04:49] That's good. I can, I can work with those wires for sure.
[04:51] That's it. So we got a new new double gang box.
[04:56] So we got a new new double gang box. All the wires we need, so I'm not going.
[04:58] All the wires we need, so I'm not going.
[05:07] That's it.
[05:13] So we got a new new double gang box.
[05:17] So we got a new new double gang box. All the wires we need, so I'm not going.
[05:19] all the wires we need so I'm not going to trim this out yet I'm going to start working on terminating the other things.
[05:23] and this will probably be the last thing we terminate here.
[05:30] okay so now we got our big beautiful Infinity Niche and we got to get our LED strip.
[05:36] so I have my LED strip ready to go.
[05:40] this is or ip65 I'm not exactly ip65 I think uh has a waterproof sheath on it.
[05:48] and so um and all the the terminations right here but this is the LED strip.
[05:55] um this strip actually fits as you saw in my other video.
[05:57] I'll put that card up in this SG 110 profile from schlutter.
[06:04] uh really nice fits right in there.
[06:08] it's almost like a almost like it was made for it.
[06:11] it's a beautiful beautiful little finish there tucks right in there.
[06:15] so we've installed that that profile gets installed with the
[06:20] that profile gets installed with the tile so if you come up here you can see
[06:24] tile so if you come up here you can see we already have that profile installed
[06:26] we already have that profile installed it runs the whole
[06:28] it runs the whole length and and in the in the corner here
[06:32] length and and in the in the corner here we got our pull
[06:33] we got our pull string so this string is going to pull
[06:36] string so this string is going to pull our our cable or low voltage cable up
[06:40] our our cable or low voltage cable up the wall and what this is is this is 16
[06:42] the wall and what this is is this is 16 gauge two
[06:44] gauge two conductor and um this isn't shielded
[06:47] conductor and um this isn't shielded wire but it's not a bad idea to use
[06:50] wire but it's not a bad idea to use shielded wire especially if you're
[06:53] shielded wire especially if you're crossing over uh 110 volt lines because
[06:56] crossing over uh 110 volt lines because it'll cause interference if if this is
[06:58] it'll cause interference if if this is run especially in in line with a 110
[07:02] run especially in in line with a 110 line it'll it'll cause interference
[07:03] line it'll it'll cause interference because again we're dealing with really
[07:05] because again we're dealing with really low voltages low wattages and um so but
[07:09] low voltages low wattages and um so but anyways we're going to tie this on here
[07:11] anyways we're going to tie this on here pull the string up and get this line so
[07:15] pull the string up and get this line so this line is going to go up into our
[07:18] this line is going to go up into our Transformer and we'll make the
[07:19] Transformer and we'll make the connection up in the attic I got some
[07:21] Connection up in the attic. I got some heat shrink tubing. I got quarter inch heat shrink tubing.
[07:24] I got quarter inch heat shrink and I got e inch heat shrink.
[07:27] Heat shrink and I got e inch heat shrink.
[07:30] So the eth inch is going to cover so before you you put your wires together.
[07:32] Before you you put your wires together um put your heat shrink tubing on.
[07:35] So my quarter inch is here. The little ones are just going to cover up my solder joint.
[07:39] And then the big one is going to give cover this sheeting here.
[07:45] So I'm going to go ahead and start.
[08:20] [Music]
[08:22] Oops, so the reason why you have to have your heat shrink on first is is now that I got the solder joint, it's going to slip over it.
[08:30] And then when I heat shrink this, it's going to just suck right down.
[08:45] So, okay, so we got those done pretty good.
[08:52] There, okay, there we go. Now it's cooled down so I can slip this up over.
[09:11] Now I got my heat shrink tubing covering the whole thing.
[09:34] okay so now I have a okay so now I have a complete completely watertight uh connection here it's protected even though this is going to be up in the wall um I still wanted to do that heat shrink um this is already waterproofed here so the only part that I'm going to have to worry about is the other end here I'm cutting this anyways but these these guys come with little caps which I usually use but I don't have any so I'm just going to use silicone so I'm going to cut it and then fill the whole thing with silicone and seal it up with silicone which is waterproof so um we'll go ahead and pull this up now and and get the strip in there okay so now we got Devon pulling up the line here got it connected there it goes hey nice and easy Devon nice and easy a little more just a couple inches
[10:37] easy a little more just a couple inches yep right there right there.
[10:40] yep right there right there perfect I got me strip already go ahead.
[10:43] perfect I got me strip already go ahead and come back down.
[10:46] Devon okay so we got our we got our line.
[10:49] Devon okay so we got our we got our line pulled up and all we have is the strip.
[10:51] pulled up and all we have is the strip sticking out but like I said I don't.
[10:53] sticking out but like I said I don't have that little cap I wish I did but.
[10:55] have that little cap I wish I did but anyways I've I've cut off the actual.
[10:58] anyways I've I've cut off the actual sheath is sticking past about 38 of an.
[11:01] sheath is sticking past about 38 of an inch here so it's protected and I'm just.
[11:04] inch here so it's protected and I'm just going to fill this up with.
[11:06] going to fill this up with silicone so I got that guy filled up.
[11:09] silicone so I got that guy filled up with.
[11:14] silicone and so this is double-sided.
[11:16] silicone and so this is double-sided sticky.
[11:17] sticky tape so I just.
[11:20] tape so I just peel peel off the the side of.
[11:25] peel peel off the the side of it and then I'll start sticking it up in.
[11:27] it and then I'll start sticking it up in there.
[11:44] It's pressure sensitive adhesive so you.
[11:46] It's pressure sensitive adhesive so you got to give it some pressure.
[11:52] I've had a lot of questions.
[11:54] Pressure I've had a lot of questions about what if the the pressure sensitive.
[11:56] About what if the the pressure sensitive adhesive comes off over time well you.
[11:59] Adhesive comes off over time well you could always silicone this strip up in here pretty easily.
[12:01] Could always silicone this strip up in here pretty easily but in the three or four years.
[12:04] Easily but in the three or four years that I've been doing this I actually.
[12:06] That I've been doing this I actually haven't had one come loose.
[12:08] Haven't had one come loose but again it's it's an easy fix if.
[12:10] Loose but again it's it's an easy fix if it is.
[12:13] Is so perfect little fit there so Devon.
[12:18] So perfect little fit there so Devon you can see go ahead and show the the strip up in there.
[12:22] You can see go ahead and show the the strip up in there.
[12:24] So I I'll also put silicone at the ends.
[12:32] So I I'll also put silicone at the ends because we still have our we still have.
[12:35] Because we still have our we still have our entry hole right here where the wire.
[12:37] Our entry hole right here where the wire went up so I'm going to silicone up in.
[12:40] Went up so I'm going to silicone up in.
[12:45] there but again if this so if this if
[12:48] there but again if this so if this if this strip or this wire anything ever goes bad we can always pull this out and
[12:54] goes bad we can always pull this out and that wire is loose in there so we could always feed another wire or you could
[12:57] always feed another wire or you could put another piece of strip I always like that wire to be loose so that you can
[13:01] that wire to be loose so that you can always do a repair if you need to nice dab on there seal that up real good over here
[13:15] good over here
[13:23] too so again I'd feel pretty confident
[13:25] too so again I'd feel pretty confident if you took you took this sprayer and sprayed that whole whole thing that's as much water as it'll ever get it would be fine
[13:30] sprayed that whole whole thing that's as much water as it'll ever get it would be fine it's it's completely sealed so you have to get the right LED strip
[13:35] fine it's it's completely sealed so you have to get the right LED strip don't get just the regular LED strips it's got to be rated ip65 or
[13:40] to be rated ip65 or ip68 um there's different ratings based
[13:45] IP68 um there's different ratings based on waterproofness so wherever you're on waterproofness so wherever you're getting your LED strips you need to getting your LED strips you need to specify you need it to be waterproof this is 12vt DC um red is positive purple's negative again over here this is a 110 side White's common black is the line.
[14:08] So so that's going to secure our our lines in place okay so we have our line here that this is going down to the switch down below we're up in the attic now.
[14:22] Okay so I got black to black wire nut again this is this is the high voltage side the one 120 volt going to go white to.
[14:46] White and I'm going to go green to bare.
[14:49] White and I'm going to go green to bare copper.
[15:04] These boxes, they don't allow you a whole lot of room in here.
[15:11] But they'll fit.
[15:13] So have all those guys in there.
[15:16] I'm going to tighten down my Rx connector.
[15:19] Here you can see that secures the high voltage.
[15:22] Side, so again polarity matters on DC.
[15:30] DC current, so our LED strips down there have polarity to what side they're on.
[15:36] You got to pay attention to that.
[15:39] And uh the connections up here do too.
[15:46] Go and feed this.
[15:57] In so again black is going to go to purple.
[16:05] I got little little blue purple.
[16:09] I got little little blue connectors for smaller wire.
[16:12] And then red is going to go to red.
[16:32] Those in there tighten this guy down it's in there.
[16:38] So that's how that goes.
[16:40] We got a little cover that's going to go on there.
[16:42] But first I want to test.
[16:44] I want to get the switch fired up and um I don't want to close this all up until I know everything is working good.
[16:50] So that's that ready.
[16:52] Okay so what we have here is we have um this is our this is our hot.
[16:59] We have, um, this is our, this is our hot wire coming in.
[17:03] This is our, this is our switch leg going up to the closet light.
[17:05] Switch leg going up to the closet light.
[17:05] This is our new, new transformer line.
[17:09] So, this is our new, new transformer line.
[17:10] So, first thing I'm going to do is get my ground cop, uh, bare coppers together.
[17:16] Do is get my ground cop, uh, bare coppers together.
[17:19] Together, they have these little copper sleeves.
[17:21] See? Sleeves, see that?
[17:21] These little guys go on there.
[17:25] All three of these wires in that way.
[17:37] You're not trying to deal with that way.
[17:39] You're not trying to deal with a bunch of bare grounds.
[17:41] You only need to hook up one.
[17:47] Like to get that out of the way.
[17:51] Next thing is is
[18:02] is my Commons and a switch all these.
[18:05] is my Commons and a switch all these Commons go together.
[18:07] Commons go together so these Commons just get wired together.
[18:11] so these Commons just get wired together this is not how you wire an outlet do.
[18:14] this is not how you wire an outlet do not do that with an outlet these are two.
[18:17] not do that with an outlet these are two switches okay so we have the back this.
[18:21] is the back of our closet switch so.
[18:24] that's on and off of the closet switch.
[18:26] so I have this is our hot wire coming in.
[18:30] the hot wire is basically junctioned up.
[18:33] right here so this this wire is hot all.
[18:35] the time no matter what if I turn that.
[18:37] on or off this wire is always hot it's.
[18:39] going into here to the.
[18:41] dimmer uh this line coming out there's.
[18:44] two Reds um this is for a three-way.
[18:47] switch so you have to use this red on.
[18:50] the back of the dimmer the one closest.
[18:52] to the black and this one goes up and.
[18:54] this is going up to our Transformer our.
[18:57] green goes to our bare copper.
[18:59] so this switches this is how it looks.
[19:02] that's off that's on and then we can dim.
[19:05] That's off, that's on, and then we can dim it down.
[19:07] So Devon, why don't you go take a look at the light?
[19:12] So I'm going to turn it off and I'm going to turn it back on.
[19:15] And then the little slide dimmer will dim it down.
[19:17] And up, the the down is having it down is really nice because you can use it like a nightlight.
[19:26] And you're literally probably pennies a month when you're operating it at this that level.
[19:27] LEDs are so efficient and draw so little power.
[19:33] And you can just turn it up like that.
[19:36] So that's how it's all wired.
[19:48] Screws, I always like to put the the screws either pointing vertical or horizontal.
[19:59] To me it's like a shower.
[20:08] Drain, I like everything to line up like that.
[20:51] Wire, oh yeah, right.
[20:56] There, okay.
[21:01] They, right.
[21:19] here so there you have it there's our
[21:21] here so there you have it there's our Transformer lined up if you ever need uh
[21:25] Transformer lined up if you ever need uh access to it you just come up in the
[21:26] access to it you just come up in the attic and fix it here's our line going
[21:28] attic and fix it here's our line going out out again if you ever had to repair
[21:30] out out again if you ever had to repair this line piece of cake plenty of slack
[21:33] this line piece of cake plenty of slack going down to the liner uh we hit a
[21:36] going down to the liner uh we hit a staple here to secure our line Rox going
[21:39] staple here to secure our line Rox going back to the switch so we're all good be
[21:42] back to the switch so we're all good be sure to watch the next video coming up
[21:44] sure to watch the next video coming up you don't want to miss it please share
[21:46] you don't want to miss it please share this video with someone who would enjoy
[21:48] this video with someone who would enjoy it click like And subscribe and please
[21:50] it click like And subscribe and please leave your comments below remember
[21:53] leave your comments below remember reason things out with each other that's
[21:55] reason things out with each other that's how we can all get better thanks again
[21:57] how we can all get better thanks again we'll see you on the next video